Sunday, June 19, 2011

Roasting hazelnuts

The baci semifreddo recipe I made last weekend called for roasted hazelnuts. I armed myself with a packet of hazelnuts and made a beeline for Stephanie Alexander's the cook's companion for advice on how to roast them. It is such a great reference book, with many simple tips and lots of information on all different types of foods.


Roast the hazelnuts at 180C on a baking tray for approximately 10 minutes. Rub them with a clean tea towel to try and remove as much of the skin as you can.

Put them into a sieve and shake to try and separate the nuts and skin. I ended up picking whatever skin was left off by hand.

Baci Semifreddo

After making friands the previous week I was left with a surplus of egg yolks. I considered various recipes to make use of them and kept coming back to custard. In the end I decided that the Baci Semifreddo recipe from Gourment Traveller would fit the bill nicely.

I had six egg yolks and so I adjusted the recipe accordingly.

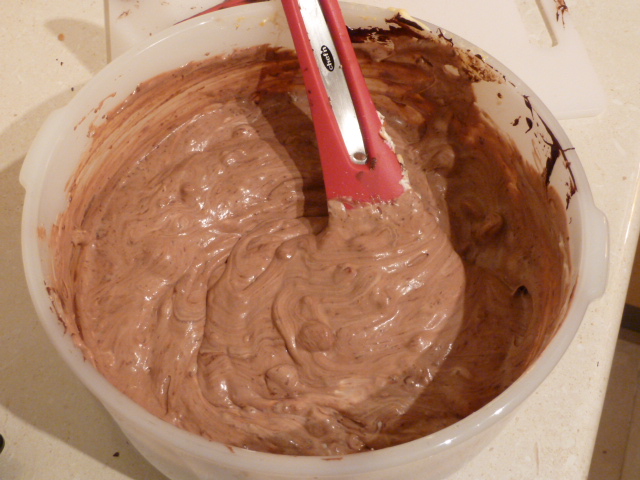
I really like the hazelnut flavour and the crunch. The Semifreddo also met with my sister E's seal of approval. Yay! I froze this in a loaf tin and have been cutting slices as I go. If I was going to serve this as a fancy dessert I might just invest in some proper moulds...

6 egg yolks
180g caster sugar
3/4 teaspoon vanilla extract
20 ml Frangelico
140 g dark chocolate, melted
1 1/2 tablespoons Dutch-process cocoa, sieved
400 ml thickened cream
180 g crème fraîche
110g roasted hazelnuts, skins removed, coarsely chopped

Line a loaf pan with plastic wrap.

Whisk yolks, sugar, vanilla and Frangelico in a heatproof bowl over a saucepan of simmering water until mixture is tripled in volume, thick and pale and holds a ribbon (4-5 minutes). I used the stab mixer that we received as a wedding present. It has a whick attachment and it was so much easier than the options of my sunbeam mixer (heavy) or by hand (laborious).

Transfer semifreddo mixture to an electric mixer and whisk until cool (2-3 minutes).

Add melted chocolate and cocoa and mix to combine.

Meanwhile, whisk cream and crème fraîche in a bowl until soft peaks form. Again, the stab mixer came in handy for whisking the dairy products.

Fold one-third of dairy into egg mixture to loosen mixture, then fold through remaining cream and hazelnuts.

Spoon into container, cover, freeze until firm (6 hours or overnight).


Notes

  • The original recipe called for a vanilla bean or vanilla paste. I had only vanilla extract or essence in the pantry and so went with vanilla extract

  • I bought a 125g packet of hazelnuts and ended up roasting and using the whole packet

  • I forgot to adjust the Frangelico amount from the recipe! Yum

Monday, June 6, 2011

Nigella's Old Fashioned Chocolate Cake


The first time I made Nigella's Old Fashioned Chocolate Cake I realised that my food processor did not have the grunt! In December I upgraded to a Kitchenaid Food Processor and last week I finally got around to testing it out on Nigella's cake.

This cake is so easy! Just add all the ingredients to the food processor and mix. Yum.

I have described here how I assembled the cake. If you would like the original Nigella method click here.

Chocolate Cake
200g plain flour
200g caster sugar
1 teaspoon baking powder
1/2 teaspoon bicarbonate of soda
40g best-quality cocoa
175g unsalted butter
2 eggs
2 teaspoons real vanilla extract
150ml sour cream

Chocolate icing
75g unsalted butter
175g dark chocolate
300g icing sugar
1 tablespoon golden syrup
125ml sour cream
1 teaspoon real vanilla extract

Chocolate Cake
Preheat the oven to 180°C. Line and grease two 20cm cake tins.


Add all of the cake ingredients to the bowl of your food processor and process until you have a smooth, thick batter.

Divide the batter into the two prepared cake tins. Spread the batter out evenly. I weigh my tins to ensure that the cakes are as even as I can get them!

Bake the cakes for approximately 25 minutes. The cakes will be cooked when a skewer comes out clean. The cakes will also start to come away from the sides of the tins.

Remove the cakes, in their tins, to a wire rack and let cool for 10 minutes before turning out of their tins.


Chocolate icing
Melt the butter and chocolate in a heat proof jug (or bowl) in the microwave. I started with 60 second bursts at 30% power and stirred between each burst with a wooden chopstick. As the chocolate and butter melts I reduced the time of the bursts. You can also melt it over a pot of simmering water.

Sift the icing sugar into the food processor.

Mix the golden syrup into the to the cooled chocolate mixture, followed by the sour cream and vanilla.

Add this mixture to the icing sugar in the food processor and process until well mixed.

Cake assembly
Place one of the cakes upside down on your serving platter. Spoon a third of the icing on to the centre of the cake half and spread until you cover the top of it evenly. Leave a centimetre or so gap between the icing and the edge of the cake as the icing will spread when the top cake is placed on top of the icing.

Sit the other cake on top, normal way up, pressing gently to sandwich the two together.

Spoon the remainder of the icing on top of the cake and spread it over the top and sides of the cake.

Notes
  • Nigella recommends taking everything out of the fridge to bring the ingredients up to room temperature

  • If you are not fortunate enough to own a decent food processor then Nigella also gives an alternative method

  • Nigella decorates the top of her cake with sugar pansies. Making these is another skill I shall have to acquire

Lime friands


My good friend M was kind enough to gift me a friand pan for my birthday this year, and I took the opportunity of afternoon tea to try it out.

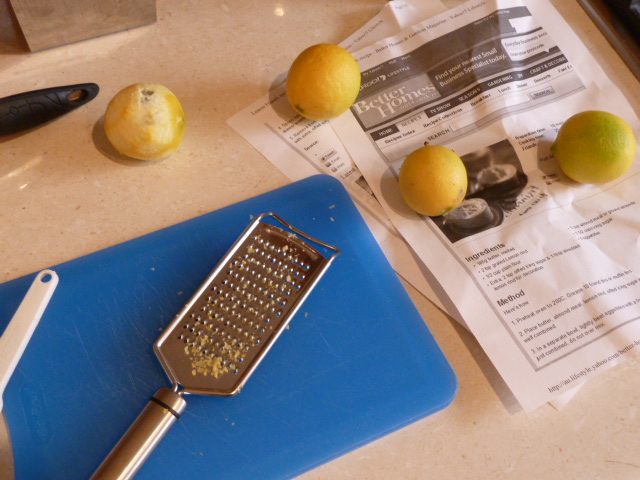
I used the powers of the internet search engine to find a recipe, and settled on this lemon friand recipe for inspiration. I tweaked it only slightly to make use of the abundance of limes that we have.

I was very happy with the result, after being concerned that my batter was a bit too lumpy and unmixed. I was informed by BakingN that the lovely crust on the friands is due to the use of butter, rather than oil, to grease the tins. I shall have to remember that for future reference!

I now have to figure out what to make with six egg yolks. Custard springs to mind, or taking that a step further, ice cream. Hmmm, lime icecream sounds good...

185g unsalted butter
2 tsp grated lime rind (approximately two limes)
1/2 cup plain flour
1 cup almond meal
1 1/2 cups pure icing sugar
6 egg whites

Extra icing sugar and lime zest to decorate

Preheat oven to 200C. Grease a twelve hole friand pan with butter.

Melt butter in a large heatproof mixing bowl.

Add lime rind to the butter and sift in plain flour, almond meal and icing sugar. Mix until well combined.

In a separate bowl, lightly beat egg whites with a fork until frothy. This should take approximately thirty seconds.

Fold egg whites into the almond mixture until just combined. Take care not to overmix the batter.

Spoon the mixture into the greased friand pan. Bake for appximately 20 minutes, until a skewer comes out clean and the friand starts to come away from the sides of the pan.

Stand the friand pan on a wire rack for five minutes before turning friands out to cool.

Dust friands with sifted icing sugar and decorate with lime zest.

Notes
  • This recipe used the zest of three limes. I made use of one of the limes by slicing it and adding to a glass jug. The jug can be used to serve water or lemonade at your afternoon tea, depending on your fancy

  • The original recipe was for ten friands, however I divided my batter into twelve

Saturday, April 2, 2011

Macadamia Brownies


Back in February now (how time flies!) I had my first Afternoon Tea of the year. I planned to make savoury and sweet, so tried to keep the recipes simple! This Macadamia Brownie recipe from Exclusively Food.

You can get the recipe from their website. Here is my interpretation.

First of all there is a lot of waffle about the cake pan. I used a heavy based aluminium tin and my cooking time was considerably under what was quoted. I checked at 35 minutes and my brownie was not gooey at all! So I would recommend checking at 30 minutes if you have a similar pan to mine. (Analong Commerical Square Pan)

This photo shows the mix with the eggs added.

Flour and nuts! I had a mixture of macadamias and pecans so my brownie was extra nut filled. The macadamias overpowered the flavour of the pecans though so I would not suggest it. I was finishing off the remnants of my pantry.

Okay. So mixed - but not over mixed - and into the lined tin.

A bit of oven magic and a cooked brownie emerges. Yay!

A cross cut of my slightly dry brownie. It was still tasty, just not as gooey as I would have preferred. Next time!

Sunday, February 20, 2011

Pineapple punch

The gym at work put out the following recipe in their Christmas newsletter. I thought that it sounded like a lovely refreshing punch for the summer season, and very simple!

1 pineapple peeled and chopped
1 litre of cold pineapple juice
1 litre of cold ginger beer
Large handful of mint leaves
Ice cubes

Blend pineapple and most of the mint in food processor until smooth.

Pour into a large jug with pineapple juice and ginger beer, mix well.

Serve in glasses over ice cube and a sprig of mint.

Wednesday, February 16, 2011

Chocolate custard


The creme patisserie recipe that I had used for the profiteroles that I made for E's birthday had not made enough to fill all of the choux pastry I had. To use them up and also not waste any of the egg yolks E had given me I made more filling! This time around I wanted a chocolate filling and I ended up using a mixture of the two creme patisserie recipes (Justin North and Simon Bryant) that I have used previously to get the right mix.

350mL milk
50mL double cream (no gelatine)
1 teaspoon vanilla extract
3 egg yolks (from 59g eggs)
80g caster sugar
40g corn flour
100g dark chocolate, chopped

Put the milk, cream and vanilla into a heavy-based sacuepan and bring to the boil. Remove from the heat and leave to infuse for 5-10 minutes.

Put the egg yolks and sugar in an electric mixer and whisk to the riboon stage. Fold in the sifted flour and cornflour.

Pour a third of the hot liquid onto the egg mixture and whisk gently to combine. Pour back into the saucepan with the rest of the hot milk and cook gently over a moderate heat for about 5 minutes, whisking all the time. The custard will thicken to a stiff and glossy smooth paste.

Add the chopped chocolate and whisk. The chocolate should melt and mix into the custard.

Remove from the heat and stand the pan in a sink of iced water. Whisk vigorously to beat out any lumps.

Notes
  • For the second round of profiteroles I topped them with melted white chocolate. I thought that would be a nice contrast to the chocolate custard filling

  • I have never used vanilla beans. Both recipes call for vanilla beans rather than extract. Maybe one day I will give it a shot


I did not manage to take any photos of the finished profiterole. The custard was made late on the night before Australia Day and I filled the pastry on the morning before we jumped onto the boat.