Showing posts with label baking. Show all posts

Thursday, November 10, 2016

Chewy m&m cookies

Last minute biscuits made for someone special to take to daycare to share. Egg and nut free, but not dairy free.

200g unsalted butter
200g brown sugar
2 tablespoons golden syrup
1 teaspoon vanilla extract
300g selfraising flour
100g m&ms

Cream butter, sugar, syrup and vanilla.
Mix in flour and m&ms
Roll dough into small balls, makes approximately 35.
Place dough balls on baking tray lined with baking paper. Do not flatten the dough!
Bake at 160C (fan forced) for 10 minutes.
Leave biscuits on tray to cool for several minutes before transferring to a wire rack. 


Original recipe here: http://www.netmums.com/recipes/chewy-chocolate-chip-cookies

Monday, December 14, 2015

Chocolate chocolate cupcakes


It has been a while since I have posted, for a few reasons but lately I have been baking yummy treats that I want to share and record!
My father is partial to chocolate so to celebrate his birthday I thought that Chocolate cupcakes with a chocolate icing would be a good way to go. Topping them off with more colourful chocolate seemed ideal and a hit with the kids.

I didn't want to reinvent any wheels so used the chocolate cupcake recipe that I have <a href="http://kfoodbook.blogspot.com.au/2012/12/short-black-cupcakes-2.html?m=1">used before</a>, and searched for a simple chocolate icing that I could pipe. I settled on <a href="http://www.browneyedbaker.com/best-chocolate-buttercream-cupcakes/?m">this recipe</a> with adjustments for metric (and half of a block of butter) as follows:<p>
<i>Chocolate Buttercream Icing</i><p>
172g pure icing sugar<p>
125g unsalted butter <p>
1/2 teaspoon vanilla extract<p>
62g dark chocolate, melted and cooled<p>
Cream butter and gradually add icing sugar. Mix well. Beat in vanilla. Beat in chocolate. Simple and yummy!


Sunday, August 7, 2011

Lime and coconut cupcakes


A few weekends ago I felt the urge to test the lime and coconut recipe that I received from the Cupcake Class. I had already tried the Vanilla and Chai recipes and decided to experiment with another flavour.

I had thought that the lime and coconut cupcakes that we tried at the class were lovely and lime flavoured but lacking in a coconut hit, so I played with the flavourings to see if I could bring it out more.

I was very happy with the icing. It was so lovely and smooth and had a great texture! I used coconut cream rather than coconut milk as that was all that was in my pantry, and in future will stick with that.

125g butter
220g caster sugar (1 cup)
2 eggs
113g self raising flour (3/4 cup)
94g plain flour (5/8 cup)
63mL coconut cream (1/4 cup)
63mL sour cream (1/4 cup)
1 teaspoon coconut essence
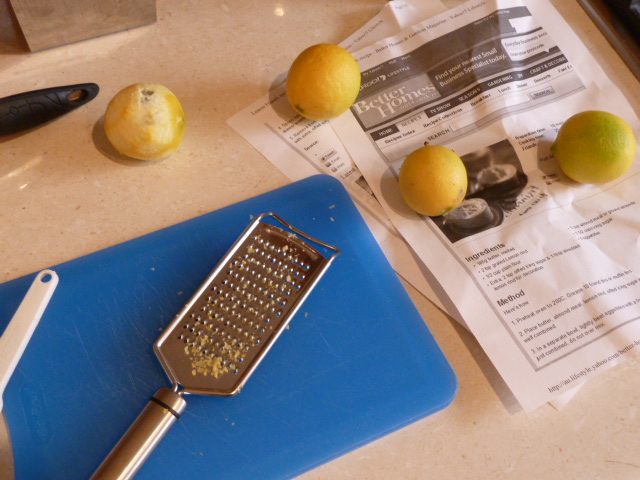
zest of four limes
juice of half a lime
2 tablespoons desiccated coconut

Method here.

The mixture made twelve cupcakes. I used the Fox Run Cup Cake Baking Paper sized cupcake liners in my Analon Commercial Muffin Pan.

The original recipe called for 20 minutes in the oven at 170C. When I checked the cupcakes after 20 minutes I found that they were already overcooked! Next time I will start looking at 18 minutes and take it from there. The cakes were not too dehydrated but were lacking a bit of moistness and were slightly crumbly.

I was also only able to get the zest off three limes and this meant that the cakes did not have the zingy lime flavour that I was expecting. In future I will try to make sure that I use the zest of at least four limes.

I was very happy with the icing that I made. It was so light and fluffy and creamy and when piped it looked so much like soft serve ice cream!

125g butter
1 1/2 cups pure icing sugar, sifted
1 teaspoon coconut essence
1/8 cup coconut cream

Beat butter to an inch of its life, until pale and fluffy.
Gradually add the icing sugar, beating well after each addition. Beat some more.
Add the essence and keep beating.
Finally, add the coconut cream.

There should be a lot of beating of the icing to get it nice and light and fluffy.

I finished off the cupcakes with some toasted shredded coconut. It was pretty easy to toast. I put some shredded coconut onto a baking tray lined with baking paper and put it in the oven for two minutes at 170C. It could probably do with only one and a half minutes however my oven timer only works in one minute increments, and I was too lazy to time it any other way.

Friday, July 15, 2011

Cupcake mania


A couple of weeks ago I thought that I would test out the new cupcake recipe that BakingN and I received from the cupcake class. It was fairly simple and I wanted to try some of the little tips that Brittany had passed on for myself.

Gather your ingredients. Make sure that you have everything that you need to cook.


Cream your butter and sugar. My butter had been out of the fridge for a couple of days and so was nice and softened by the time I was ready to bake! Start beating the butter first, then gradually add the sugar.


Mix in the vanilla extract and eggs. Add the eggs one at a time and incorporate each egg well before adding the next one. Brittany maintains that the reason why we do this is that it helps to prevent the mixture from splitting.


Mix in the sifted flours. Brittany's recommendation is to do it with a spatula, as beating it with the electric beaters can make the batter chewy.

Finally add in the wet ingredients and mix well with your trusty spatula.


The batter is now ready to either decant into cupcake liners or to add flavourings.


I was fairly conservative and made vanilla cupcakes and chai cupcakes. I wanted to see how the mixture went first before branching out!


If I make this recipe again before the lime season is over then I might just try the lime and coconut flavour.

The icing recipe was new for me, usually when I make buttercream icing I just use butter and icing sugar. This time around I added vanilla and milk as directed.

Beat your softened butter, then gradually add the sifted icing sugar. Add the vanilla and milk. Remove the beaters and mix further with your spatula.


I was a little more conservative with my icing and tried to pipe it flat onto the cakes, rather than swirling it to a peak. This meant that there was less icing and I found that the equivalent amount of butter (125g in the cupcakes and 125g in the icing) was the perfect proportion.

Friday, July 1, 2011

A class of cupcakes!

On Wednesday night BakingN and I made our way to The Home Provedore in Fremantle to take part in their Cupcake Class! We were not sure what exactly to expect. We have made the odd cupcake or two before but thought that it would be fun to see another perspective.

We were running a little late (damn traffic!) and so the class had started as we came in. Chef Brittany Kemp talked us through the steps of her Vanilla Cupcake recipe, and we were able to see the batter through its various stages. Once the batter was made, she split it into four and added flavourings so that we could sample more than just Vanilla.

Whilst the cupcakes were baking Brittany showed us how to make buttercream icing and demonstrated some basics with the piping bags. It was then our turn to swirl small blobs of icing and try and master the technique. BakingN showed her perfect skills off, whereas my blogs looked, well, blobby!

We were able to sample all of the cake flavours fresh from the oven. It was difficult to stop but I remembered that I had to share.

The (pleasant) surprise for me was that we all got to take four cupcakes home, one of each flavour. They had been previously baked and hidden from in boxes at the back of the room. Brittany had piped icing on two of them and we got to practice our skills again on our own cakes.

If you look closely at this photo of my cakes you can quite easily tell the two cupcakes that were piped by the experienced professional. The flavours were vanilla, coconut & lime, pear & white chocolate and chai. I was impressed by the chai flavoured cupcakes, and next time I go to a supermarket I am going to look for the chai powder.

Things that I learned
I cannot speak for BakingN, but I did learn a few things from the class. For starters, I have a new cupcake recipe using natural yoghurt, and I cannot wait to try it! I already have my unsalted butter out of the fridge to soften in anticipation of making them tomorrow or Sunday.

One of the things that impressed me about the class was that Brittany showed us how easy it was to flavour the cakes. I have never really experimented with my cupcake recipes and follow them fairly closely. I can see the advantage of making a batch of batter and then mixing different flavours into it, and plan to do just that when I make my first batch.

My piping skills were shown to be lacking, and I will try to apply the advice that we were given. Essentially, squeeze the piping bag from the top, hold the bag vertically and keep the nozzle at the correct distance away from the icing swirl.

If you are a beginner cupcake baker, or looking to improve your cupcake skills, then this could be the class for you! As for me, I am looking forward to eating more chai flavoured cupcakes as well as experimenting a bit more with flavours. Yum!

Monday, June 6, 2011

Nigella's Old Fashioned Chocolate Cake


The first time I made Nigella's Old Fashioned Chocolate Cake I realised that my food processor did not have the grunt! In December I upgraded to a Kitchenaid Food Processor and last week I finally got around to testing it out on Nigella's cake.

This cake is so easy! Just add all the ingredients to the food processor and mix. Yum.

I have described here how I assembled the cake. If you would like the original Nigella method click here.

Chocolate Cake
200g plain flour
200g caster sugar
1 teaspoon baking powder
1/2 teaspoon bicarbonate of soda
40g best-quality cocoa
175g unsalted butter
2 eggs
2 teaspoons real vanilla extract
150ml sour cream

Chocolate icing
75g unsalted butter
175g dark chocolate
300g icing sugar
1 tablespoon golden syrup
125ml sour cream
1 teaspoon real vanilla extract

Chocolate Cake
Preheat the oven to 180°C. Line and grease two 20cm cake tins.


Add all of the cake ingredients to the bowl of your food processor and process until you have a smooth, thick batter.

Divide the batter into the two prepared cake tins. Spread the batter out evenly. I weigh my tins to ensure that the cakes are as even as I can get them!

Bake the cakes for approximately 25 minutes. The cakes will be cooked when a skewer comes out clean. The cakes will also start to come away from the sides of the tins.

Remove the cakes, in their tins, to a wire rack and let cool for 10 minutes before turning out of their tins.


Chocolate icing
Melt the butter and chocolate in a heat proof jug (or bowl) in the microwave. I started with 60 second bursts at 30% power and stirred between each burst with a wooden chopstick. As the chocolate and butter melts I reduced the time of the bursts. You can also melt it over a pot of simmering water.

Sift the icing sugar into the food processor.

Mix the golden syrup into the to the cooled chocolate mixture, followed by the sour cream and vanilla.

Add this mixture to the icing sugar in the food processor and process until well mixed.

Cake assembly
Place one of the cakes upside down on your serving platter. Spoon a third of the icing on to the centre of the cake half and spread until you cover the top of it evenly. Leave a centimetre or so gap between the icing and the edge of the cake as the icing will spread when the top cake is placed on top of the icing.

Sit the other cake on top, normal way up, pressing gently to sandwich the two together.

Spoon the remainder of the icing on top of the cake and spread it over the top and sides of the cake.

Notes
  • Nigella recommends taking everything out of the fridge to bring the ingredients up to room temperature

  • If you are not fortunate enough to own a decent food processor then Nigella also gives an alternative method

  • Nigella decorates the top of her cake with sugar pansies. Making these is another skill I shall have to acquire

Lime friands


My good friend M was kind enough to gift me a friand pan for my birthday this year, and I took the opportunity of afternoon tea to try it out.

I used the powers of the internet search engine to find a recipe, and settled on this lemon friand recipe for inspiration. I tweaked it only slightly to make use of the abundance of limes that we have.

I was very happy with the result, after being concerned that my batter was a bit too lumpy and unmixed. I was informed by BakingN that the lovely crust on the friands is due to the use of butter, rather than oil, to grease the tins. I shall have to remember that for future reference!

I now have to figure out what to make with six egg yolks. Custard springs to mind, or taking that a step further, ice cream. Hmmm, lime icecream sounds good...

185g unsalted butter
2 tsp grated lime rind (approximately two limes)
1/2 cup plain flour
1 cup almond meal
1 1/2 cups pure icing sugar
6 egg whites

Extra icing sugar and lime zest to decorate

Preheat oven to 200C. Grease a twelve hole friand pan with butter.

Melt butter in a large heatproof mixing bowl.

Add lime rind to the butter and sift in plain flour, almond meal and icing sugar. Mix until well combined.

In a separate bowl, lightly beat egg whites with a fork until frothy. This should take approximately thirty seconds.

Fold egg whites into the almond mixture until just combined. Take care not to overmix the batter.

Spoon the mixture into the greased friand pan. Bake for appximately 20 minutes, until a skewer comes out clean and the friand starts to come away from the sides of the pan.

Stand the friand pan on a wire rack for five minutes before turning friands out to cool.

Dust friands with sifted icing sugar and decorate with lime zest.

Notes
  • This recipe used the zest of three limes. I made use of one of the limes by slicing it and adding to a glass jug. The jug can be used to serve water or lemonade at your afternoon tea, depending on your fancy

  • The original recipe was for ten friands, however I divided my batter into twelve

Saturday, April 2, 2011

Macadamia Brownies


Back in February now (how time flies!) I had my first Afternoon Tea of the year. I planned to make savoury and sweet, so tried to keep the recipes simple! This Macadamia Brownie recipe from Exclusively Food.

You can get the recipe from their website. Here is my interpretation.

First of all there is a lot of waffle about the cake pan. I used a heavy based aluminium tin and my cooking time was considerably under what was quoted. I checked at 35 minutes and my brownie was not gooey at all! So I would recommend checking at 30 minutes if you have a similar pan to mine. (Analong Commerical Square Pan)

This photo shows the mix with the eggs added.

Flour and nuts! I had a mixture of macadamias and pecans so my brownie was extra nut filled. The macadamias overpowered the flavour of the pecans though so I would not suggest it. I was finishing off the remnants of my pantry.

Okay. So mixed - but not over mixed - and into the lined tin.

A bit of oven magic and a cooked brownie emerges. Yay!

A cross cut of my slightly dry brownie. It was still tasty, just not as gooey as I would have preferred. Next time!

Wednesday, December 15, 2010

Fruit mince pies!


Christmas is fast approaching and it is a good excuse for me to make some more fruit mince pies. Yum!

I was unadventurous this year and used the Donna Hay recipe that I used last year. I was hoping that this would make it easier. I still managed to come up with some notes the second time around. See here for the notes from last year.
  • I abandoned the thin plastic cookie cutters that I have in favour of my tupperware scone cutter. Okay, it is still plastic but much more durable. I would really like to buy a 7cm metal cutter though for future use with my patty pan tray

  • The best way to get the pies out of the tray - if they become stuck - is using a plastic knife. For starters it will not scratch the non-stick coating and secondly the plastic knife that I used bent and was better for getting out the curved bottom pies

  • I used my new Kitchenaid food processor to make the pastry. Yay! It was so quick to make the pastry and the motor did not struggle at all

  • A second tray would be very handy, as the recipe makes two batches. The tray was hot straight out of the oven and I needed to wash the syrup off the tray before I could use it again! I will keep my eye out for one that is non-stick - E and I saw that Willow has them and so I will try to find a couple after the craziness of Christmas

  • I noticed in the current Donna Hay Magazine that she had a recipe for spiced fruit mince pies, with a spiced shortcrust pastry recipe. I had already made my pastry though so too late to experiment this time around

  • I could see the benefit of having guides for rolling out your pastry to make sure that the pastry height is even. I always manage to have it thicker in the middle and the edges are thin. The pastry that was rolled first showed the least distortion during cooking so the aim is to cut them all from the same roll

Wednesday, September 15, 2010

White chocolate and Macadamia Cookies


Father’s Day (and Mother’s Day for that matter) is always a good excuse to have the family around for dinner. Of course, a good dessert is essential to finish any dinner and since Dad loves chocolate I thought that I would bake something along that theme. I initially planned to make chocolate brownies and serve with vanilla ice cream, but I ran out of time to make them and thought I would make something simpler and quicker – white chocolate and macadamia cookies. Yum!

I looked to Donna Hay Chocolate for inspiration. I had not tried this recipe before and I was a little skeptical about the amount of flour and other dry ingredients. It seemed like a lot of flour to the ratio of wet ingredients but I pressed on. I ended up using my hands to bring the dough together but it did in the end and they baked beautifully!

125g unsalted butter
1/2 teaspoon vanilla extract
1 cup caster sugar
1 egg
1 cup plain flour, sifted
1 cup self-raising flour, sifted
1 cup unsalted macadamias, chopped
250g white chocolate, chopped

Preheat oven to 180C. Line two baking trays with baking paper.

Cream butter, vanilla and sugar. Add the egg and beat until incorporated.

Mix in the flours, macadamias and white chocolate.

Form two tablespoons of mixture into a ball, place on lined baking tray and flatten slightly.

Bake for up to 12 minutes or until just golden. Cool on trays

Saturday, July 24, 2010

Chcolate cupcakes with White chocolate icing


Mum and I made my favourite chocolate cupcakes in honour of my friend SH's baby shower. In lieu of the normal coffee buttercream I wanted to find a simpler icing. SH is generally unable to eat cream so a ganache was out, pregancy overruled a cream cheese icing and so I searched for a white chocolate icing.

I found this recipe and thought that I would give it a crack!

30g white chocolate
1 tablespoon water
115g icing sugar, sifted
1 teaspoon vanilla essence

Place chocolate in a heatproof bowl over a saucepan of simmering water, and melt.

Turn off the heat and gradually add the icing sugar, water and essence, stirring as you go.

Reheat icing as needed.

Notes
- The icing cooled pretty quickly so the last few cakes just crumbled when Mum tried to ice them.
- Yum. But I would still like to find a recipe for icing that looks a little prettier.

Monday, June 28, 2010

Birthday cake pops!


Back in March my friend KC asked if I would like to give her a hand making cake pops for her daughter's 1st birthday party. As much as I would have loved to it was actually on the Easter weekend and I was going to be in Tasmania!

I expressed my regrets (it did sound like a lot of fun!) and asked her for some photos and words so that I could post about it.

She was inspired by this post to turn her hand at chicks, bunnies and easter eggs.

In KC's words:
I have pics from our cake pops work. Here are the low res ones so far plus one of general food. The chicks turned out by far the best but, alas, the focus was off on the photos. NM and I took plenty of shots of our prep work. Two problems with the recipe, I think:
1. We can’t get cream cheese frosting in a can here so the homemade version we used was too sweet, too liquid and too much – this meant the cake filling needed major chilling to encourage it to keep its shape.
2. A vessel small enough for a bit of chocolate but deep enough to dip was problematic. Tupperware jug worked best but was quite large. We tried a Pyrex small jug in the microwave but it retained the heat too well and the chocolate seized.

Anyway, worth a try another time now I have LOTS and LOTS of sprinkle thingies and a fair bit of chocolate colouring agent left.

Ciao!
Bunnies
Eggs!
The picnic spread, with hidden treats!

Images courtesty of KC

Friday, June 25, 2010

Apple & Cranberry Crumble


Last night C asked me when I was going to make apple pie. Considering that we only had two (small) apples I knew it was not going to be last night, so I offered to make apple crumble instead. He was keen and so I got to work.

1/2 cup wholemeal plain flour
1/2 cup rolled oats
1/2 cup brown sugar
50g butter
2 apples
1/2 cup cranberries
4 teaspoons golden syrup

Preheat oven to 180C.

I put the flour, oats and sugar into a bowl, and mixed them with my hand. The sugar needed to be broken up a bit too. I then chopped the butter finely and rubbed it into the flour mixture.

I cut the apple into small pieces. Into each 250mL ramekin I put half an apple, some frozen cranberries and a teaspoon of golden syrup.

I put a quarter of the crumble mixture onto the top of each ramekin, topped with a small blob of butter.

I baked the ramekins for around half an hour. I checked it with a fork after 25 minutes to see if the apple was cooked.

Serve with ice cream!

Notes
- The crumble topping was enough for four serves, so I made two last night and froze the rest of it. I made crumble again tonight. Yum!
- I definitely recommend putting your ramekins onto a tray. It is much easier to move them in and out of the oven this way.
- I probably used around 30g butter for the crumble topping, and I think that it should have had a little more so I have increased the quantity.

Tuesday, June 8, 2010

Chocolate chunk muffins


Public holidays are always a good excuse to catch up with friends! I did not wish to turn up empty handed and I was too lazy to walk to the shops to buy strawberries so I thought that muffins would be appreciated. I was initially going to make triple chocolate fudge cookies however I realised that I needed to refrigerate the cookie dough for an hour, and I only had about that long to make and bake. I turned to Donna Hay's Simple Essentials: Chocolate for inspiration and this recipe.

2 cups self-raising flour, sifted
1/3 cup cocoa powder, sifted
1 teaspoon baking powder
1 cup caster sugar
2 eggs
1 teaspoon vanilla extract
2/3 cup light olive oil
1/2 cup milk
200g chocolate bits (I used 100g each of white and dark)

Preheat oven to 180C.

Sift the flour, cocoa, baking powder and caster sugar into a bowl. Sift and mix to combine.

In a separate bowl (or large jug!) combine the eggs, vanilla, oil and milk and whisk together.

Stir the egg mixture into the flour mixture.

Fold in the chocolate bits and spoon into 12 x 1/2 cup muffin cases.

Bake for 20-25 minutes.

Notes
- The recipe called for vegetable oil, and 1 cup of chopped milk chocolate in lieu of the bits. I had already measured out the chocolate for the cookies so just used what I had.
- My muffins ended up dry. At the end of 25 minutes they were still slightly moist inside and I think at that point I should have pulled them out.
- I sifted my dry ingredients and then sifted them some more for good measure to mix them up rather than stirring with my spatula.
- Very chocolate-y and yum!

Monday, June 7, 2010

Rhubarb inspiration


Last summer C's mum gave us fresh rhubarb to eat and I was stuck with how we could cook it. I tried a few recipes, including these rhubarb muffins, but did not come up with anything too exciting.

These two recipes are ones that I could see myself trying next summer. Rustic Rhubarb Tarts by Smitten Kitchen and Rhbuarb Tart by Tartlette.

Tartlette's recipes are gluten free however she does give directions for using normal plain flour. The comments on her recipe indicate that the Xantham Gum is only required if you go gluten free.

I especially love the fact that she gives measurements in metric! I usually shy away from recipes from the US. There are enough rcipes out there with metric measurements and I am too lazy to translate imperial and farenheit.

Images belong to Smitten Kitchen and Tartlette