Thursday, November 10, 2016

Chewy m&m cookies

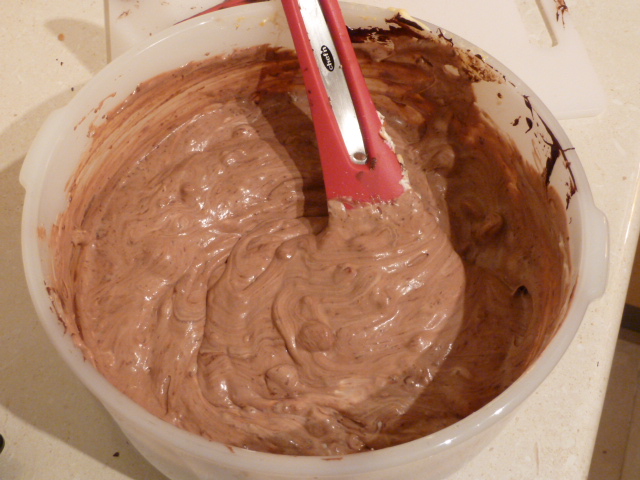
Last minute biscuits made for someone special to take to daycare to share. Egg and nut free, but not dairy free.

200g unsalted butter
200g brown sugar
2 tablespoons golden syrup
1 teaspoon vanilla extract
300g selfraising flour
100g m&ms

Cream butter, sugar, syrup and vanilla.
Mix in flour and m&ms
Roll dough into small balls, makes approximately 35.
Place dough balls on baking tray lined with baking paper. Do not flatten the dough!
Bake at 160C (fan forced) for 10 minutes.
Leave biscuits on tray to cool for several minutes before transferring to a wire rack. 


Original recipe here: http://www.netmums.com/recipes/chewy-chocolate-chip-cookies

Sunday, February 14, 2016

Gingermen!

Christmas is just not the same without gingermen!!
I used the recipe that I have posted before. http://kfoodbook.blogspot.com.au/2009/12/run-run-as-fast-as-you-can.html?m=1. Since then I have added a rolling pin with height guides to our baking basics and it is super handy in helping to roll your biscuit dough out at a regular height!!

Hummingbird cake


A surplus of bananas meant some baking was called for. I opted for a hummingbird cake as something a bit different than the usual banana and chocolate muffins.
The recipe that I used was from my favourite AWW Cafe Cakes book with a few tweaks
- substitute wholemeal plain flour for the white plain flour
- bake for 40 minutes at 160C
- mix dry and wet ingredients separately then combine together until just mixed
It was very moist and very tasty!

440g tin crushed pineapple
1 cup wholemeal plain flour
1/2 cup self raising flour
1/2 teaspoon bicarb
1/2 teaspoon ground cinnamon
1:2 teaspoon ground gunger
3/4 cup brown sugar
1/2 cup dessicated coconut
4 ripe bananas
3/4 cup olive oil
1/4 cup pineapple juice (drained from the crushed pineapple)
2 eggs

Drain the pineapple and reserve juice
Sift together dry ingredients and mix well
Mash bananas and mix in oil, pineapple, 1/4 cup juice and eggs
Combine wet ingredients into dry until just combined.
Bake at 160C (fan forced) as follows:
23cm square cake for 40 minutes
15g mini cupcake 11 minutes
70g cupcake 20 minutes

60g cream cheese
30g butter
1 teaspoon vanilla extract
1 1/2 cups icing sugar

Beat cream cheese, butter and extract until fluffy.
Gradually add in icing sugar, mixing well
Spread over cake.


Friday, January 15, 2016

Try again...

I tried posting photos and a recipe from the iPhone blogger app but it seems I need to do some more  work on the post on my laptop... Hopefully this post will not need any more editing!

Sunday, December 27, 2015

Christmas pudding

Nice to follow at least one of the traditions.
Pudding with a bit of gold sparkle!

Monday, December 14, 2015

Chocolate chocolate cupcakes


It has been a while since I have posted, for a few reasons but lately I have been baking yummy treats that I want to share and record!
My father is partial to chocolate so to celebrate his birthday I thought that Chocolate cupcakes with a chocolate icing would be a good way to go. Topping them off with more colourful chocolate seemed ideal and a hit with the kids.

I didn't want to reinvent any wheels so used the chocolate cupcake recipe that I have <a href="http://kfoodbook.blogspot.com.au/2012/12/short-black-cupcakes-2.html?m=1">used before</a>, and searched for a simple chocolate icing that I could pipe. I settled on <a href="http://www.browneyedbaker.com/best-chocolate-buttercream-cupcakes/?m">this recipe</a> with adjustments for metric (and half of a block of butter) as follows:<p>
<i>Chocolate Buttercream Icing</i><p>
172g pure icing sugar<p>
125g unsalted butter <p>
1/2 teaspoon vanilla extract<p>
62g dark chocolate, melted and cooled<p>
Cream butter and gradually add icing sugar. Mix well. Beat in vanilla. Beat in chocolate. Simple and yummy!


Sunday, December 2, 2012

Short Black Cupcakes #2

My mixer survived... a set of replacement beaters and it was good to go again! I had mixed feelings about this. On the one hand I think it's great to have such a vintage piece of kitchen equipment, and on the other hand I was wanting to to get myself an up to date machine with all sorts of optional extras.
Cupcakes are my current baking staple, and today I thought to revisit the Short Black Cupcakes.
I (roughly) followed the Donna Hay version again, with the following tweaks.

125g butter, softened
3/4 cup caster sugar
2 eggs
1 1/4 cups plain flour
1 teaspoon baking powder
2 tablespoons cocoa powder
1/4 cup milk
1/4 cup natural yoghurt
100g dark chocolate, melted

Preheat the oven to 160C.
Cream butter and gradually add sugar.
Add eggs one at a time. Beat well.
Sift flour, cocoa and baking powder.
Add to butter mix and combine well.
Mix in the milk, yoghurt and chocolate.
Spoon 70g of mixture into cupcake papers and place in a muffin tray.
Bake for 18 minutes.
Cool on wire racks.

I had another bash at the icing, and tried different proportions this time around.

125g butter
1 1/2 cups pure icing sugar
30mL cup milk
1 teaspoons instant coffee

Cream butter and gradually add sugar.
Dissolve coffee into milk.
Gradually add coffee mix into the butter and sugar, beat until well combined.

I was very happy with this recipe and combination and will definitely make it again!

Saturday, August 27, 2011

I think it is terminal...


My mixmaster hiding on the right

I was trying to make butter cream icing today and I was having problems getting my beaters to click into my mixmaster. It worked okay last night when I made the cupcakes but for some reason today was not my day.

I wrestled a few times, getting more and more frustrated and eventually decided that they just were not going to click in! I finished off the icing on one beater but it was nowhere near as fluffy or full as usual and I ran out of icing - usually I have too much!

The mixmaster was inherited from a family member. I think it belonged to my grandmother but possibly it was my Aunt's. It has seen a good innings and if C cannot fix it then I shall have to replace it with something new and shiny and that will hopefully last just as long!

Sunday, August 7, 2011

Chai cupcakes


Last weekend I gave the chai cupcake recipe another spin! One of my new workmates drinks chai latte in the office and every time I smelt it I told him that I would make him a chai cupcake to eat.

I found it easier to make the cupcakes in a single flavour rather than splitting it between vanilla and chai. I am not too sure what I did differently but the first time I tried the recipe I only had enough batter for ten cupcakes. This time around I had too much for twelve and should have made a spare thirteenth... or eaten the leftover batter.

At any rate I wanted to spice up the icing - rather than having just a plain vanilla - and KroissantK* suggested that cinnamon would complement the chai cupcake nicely. I added ground cinnamon to the icing recipe and also sprinkled the icing with the cinnamon. The spice in the icing was nice but I am not so sure about the sprinkle as the cinnamon has melted into the icing and made it look slightly diseased.

Still, the cupcakes were appreciated by C and the boys at work and that is all that matters!


The chai flavour in the cupcakes comes from chai latte powder. It is a quick and easy way to impart a pseudo chai flavour into the cupcakes. Even though it says "spice" on the tin, the ingredients list is a bit scary and I hesitated before I purchased the box. (Image)

* My mother and I visited KroissantK to meet her new baby. We were impressed that with a month old baby and a toddler she managed to make us beautiful croissants and pain au chocolat from scratch! In honour of that, and to differentiate all of the random letters that make up my friends, I have deemed her KroissantK.

Lime and coconut cupcakes


A few weekends ago I felt the urge to test the lime and coconut recipe that I received from the Cupcake Class. I had already tried the Vanilla and Chai recipes and decided to experiment with another flavour.

I had thought that the lime and coconut cupcakes that we tried at the class were lovely and lime flavoured but lacking in a coconut hit, so I played with the flavourings to see if I could bring it out more.

I was very happy with the icing. It was so lovely and smooth and had a great texture! I used coconut cream rather than coconut milk as that was all that was in my pantry, and in future will stick with that.

125g butter
220g caster sugar (1 cup)
2 eggs
113g self raising flour (3/4 cup)
94g plain flour (5/8 cup)
63mL coconut cream (1/4 cup)
63mL sour cream (1/4 cup)
1 teaspoon coconut essence
zest of four limes
juice of half a lime
2 tablespoons desiccated coconut

Method here.

The mixture made twelve cupcakes. I used the Fox Run Cup Cake Baking Paper sized cupcake liners in my Analon Commercial Muffin Pan.

The original recipe called for 20 minutes in the oven at 170C. When I checked the cupcakes after 20 minutes I found that they were already overcooked! Next time I will start looking at 18 minutes and take it from there. The cakes were not too dehydrated but were lacking a bit of moistness and were slightly crumbly.

I was also only able to get the zest off three limes and this meant that the cakes did not have the zingy lime flavour that I was expecting. In future I will try to make sure that I use the zest of at least four limes.

I was very happy with the icing that I made. It was so light and fluffy and creamy and when piped it looked so much like soft serve ice cream!

125g butter
1 1/2 cups pure icing sugar, sifted
1 teaspoon coconut essence
1/8 cup coconut cream

Beat butter to an inch of its life, until pale and fluffy.
Gradually add the icing sugar, beating well after each addition. Beat some more.
Add the essence and keep beating.
Finally, add the coconut cream.

There should be a lot of beating of the icing to get it nice and light and fluffy.

I finished off the cupcakes with some toasted shredded coconut. It was pretty easy to toast. I put some shredded coconut onto a baking tray lined with baking paper and put it in the oven for two minutes at 170C. It could probably do with only one and a half minutes however my oven timer only works in one minute increments, and I was too lazy to time it any other way.

Saturday, August 6, 2011

Cupcake Icing tutorials

I have been trawling the depths of the internet, looking for alternative ways to decorate cupcakes! I am slightly ashamed of my plastic tips and I think that the next time I head to a kitchenware shop I will be adding to my collection of tips and piping bags.


Friday, July 15, 2011

Cupcake mania


A couple of weeks ago I thought that I would test out the new cupcake recipe that BakingN and I received from the cupcake class. It was fairly simple and I wanted to try some of the little tips that Brittany had passed on for myself.

Gather your ingredients. Make sure that you have everything that you need to cook.


Cream your butter and sugar. My butter had been out of the fridge for a couple of days and so was nice and softened by the time I was ready to bake! Start beating the butter first, then gradually add the sugar.


Mix in the vanilla extract and eggs. Add the eggs one at a time and incorporate each egg well before adding the next one. Brittany maintains that the reason why we do this is that it helps to prevent the mixture from splitting.


Mix in the sifted flours. Brittany's recommendation is to do it with a spatula, as beating it with the electric beaters can make the batter chewy.

Finally add in the wet ingredients and mix well with your trusty spatula.


The batter is now ready to either decant into cupcake liners or to add flavourings.


I was fairly conservative and made vanilla cupcakes and chai cupcakes. I wanted to see how the mixture went first before branching out!


If I make this recipe again before the lime season is over then I might just try the lime and coconut flavour.

The icing recipe was new for me, usually when I make buttercream icing I just use butter and icing sugar. This time around I added vanilla and milk as directed.

Beat your softened butter, then gradually add the sifted icing sugar. Add the vanilla and milk. Remove the beaters and mix further with your spatula.


I was a little more conservative with my icing and tried to pipe it flat onto the cakes, rather than swirling it to a peak. This meant that there was less icing and I found that the equivalent amount of butter (125g in the cupcakes and 125g in the icing) was the perfect proportion.

Sunday, July 3, 2011

Berry and white chocolate muffins


Following my efforts with the baci semifreddo I found myself with a surplus of double cream and creme fraiche. I knew just the recipe and pulled out my Donna Hay simple essentials: chocolate cook book. Muffins are simple to make and easy to share with my work mates!

2 cups self-raising flour
3/4 cup caster sugar
1 cup sour cream
2 eggs
1 teaspoon finely grated lemon rind
1/3 cup vegetable oil
1 1/2 cups raspberries
1 cup chopped white chocolate


Preheat the oven to 180C.

Place the flour and sugar into a bowl and mix to combine.

Combine the sour cream, eggs, lemon rind and oil and whisk together.


Stir the sour cream mixture into the flour mixture until just combined. Fold through the raspberries and chocolate. I do not think that I mixed well enough before I added the berries and chocolate, if you look closely you can see a fair amount of flour in the batter.


Spoon the mixture into 8 texas muffin tins lined with paper patty cases.
Bake for 25-30 minutes or until cooked when tested with a skewer.


Notes
  • I made 12 muffins in cases in a 1/3 cup tray. Cook for approximately 20 minutes

  • I made a few tweaks to the recipe, substituting wholemeal flour and using a combination of sour cream, creme fraiche and double cream, as well as lime rind instead of the lemon rind as we have an oversupply

  • For vegetable oil I always use a light olive oil

  • The berries that were in my freezer were mixed berries, and quite icy. I tried to pick out the ice as best I could

  • For chocolate I had a combination of chocolate melts and white chocolate.

Friday, July 1, 2011

Queen of hearts at Koko Black


Last Sunday E and I topped off our exhausting shopping efforts at the Upmarket with a visit to the recently opened Koko Black in Claremont.

It was lunchtime and I was a little unsure as to whether we would be able to find anything savoury at a chocolate salon! They luckily had a couple of sandwiches on the menu and we combined those with a Queen of Hearts high tea.


We had a choice of drinks with our high tea. There were so many interesting options on the menu and E went for a chocolate chai. It needed to be strained and was so thick that she could not pass it through the strainer! I was concerned about a sugar overload - I had to run around later in the afternoon - and stayed conservative with a pot of English Breakfast Tea.


Our stack of loveliness had two tiers. The bottom, savoury tier included toasted sandwiches with fillings of roasted vegetable and also pastrami & gruyere, and mini tarts with fillings of tomato as well as leek. The top sweet tier had a selection of five of the sweet treats that tantalised us from the display cabinet. Our selection included a cream filled lamington, creme brulee, lemon tart, chocolate opera cake and an orange tart. My favourite was the creme brulee. It had a nice top that you cracked through to get to the runny vanilla centre. Bliss!


The Queen of Hearts was $37 for two people, including the drinks. We were very impressed with the spread and I thought it was great value for money. It was all very tasty and so well presented. We made sure to bring a few sweet treats home for C! I got in trouble for not bringing him anything home from E's and my visit to the Sherbert Cafe.

Revisiting the lime curd tart


C came home from work on Saturday and asked if I would make a lime tart for him to share with his workmates. There was nothing on television so I was happy to get creative in the kitchen! He gave me a hand making the pastry and the curd, then went to bed and left it to me to roll and blind bake the pastry!

I used the lime curd tart recipe that I had made last year for Mother's Day.

I am not sure why but this time around I really struggled to get my pastry into the tart shell. Initially it was too soft, even after an hour or so in the fridge, and when I tried to put it into the tart shell it just fell apart. After pulling it back into a ball I rolled it out and put it back into the fridge for some more chilling. I then tried to put the chilled pastry into the tart. It was too rigid and I ended up slicing off the edges of the pastry on the top of the tart.

It's terribly sad but on Sunday night I stayed awake for a little while trying to figure out how to best get the pastry into the tart shell. The best I could come up with was to have two tart tins of the same size, and to first shape the pastry over an upside down tart tin before I put the tart tin that I am using upside down onto the pastry and inverting. It sounds complicated when I try to explain but I might give it a try next time I pull out the pastry.

Even though my efforts in putting the pastry into the tin ended up a shambles, the pastry still baked well and I had no shrinkage at all. At least I have some positives!

Another positive from the tart this time around is that my new Kitchenaid Food Processor was quite happy in making the pastry. I am so glad that I spent the bucks last year to buy it, and it might be the last treat I give myself for some time!

A class of cupcakes!

On Wednesday night BakingN and I made our way to The Home Provedore in Fremantle to take part in their Cupcake Class! We were not sure what exactly to expect. We have made the odd cupcake or two before but thought that it would be fun to see another perspective.

We were running a little late (damn traffic!) and so the class had started as we came in. Chef Brittany Kemp talked us through the steps of her Vanilla Cupcake recipe, and we were able to see the batter through its various stages. Once the batter was made, she split it into four and added flavourings so that we could sample more than just Vanilla.

Whilst the cupcakes were baking Brittany showed us how to make buttercream icing and demonstrated some basics with the piping bags. It was then our turn to swirl small blobs of icing and try and master the technique. BakingN showed her perfect skills off, whereas my blogs looked, well, blobby!

We were able to sample all of the cake flavours fresh from the oven. It was difficult to stop but I remembered that I had to share.

The (pleasant) surprise for me was that we all got to take four cupcakes home, one of each flavour. They had been previously baked and hidden from in boxes at the back of the room. Brittany had piped icing on two of them and we got to practice our skills again on our own cakes.

If you look closely at this photo of my cakes you can quite easily tell the two cupcakes that were piped by the experienced professional. The flavours were vanilla, coconut & lime, pear & white chocolate and chai. I was impressed by the chai flavoured cupcakes, and next time I go to a supermarket I am going to look for the chai powder.

Things that I learned
I cannot speak for BakingN, but I did learn a few things from the class. For starters, I have a new cupcake recipe using natural yoghurt, and I cannot wait to try it! I already have my unsalted butter out of the fridge to soften in anticipation of making them tomorrow or Sunday.

One of the things that impressed me about the class was that Brittany showed us how easy it was to flavour the cakes. I have never really experimented with my cupcake recipes and follow them fairly closely. I can see the advantage of making a batch of batter and then mixing different flavours into it, and plan to do just that when I make my first batch.

My piping skills were shown to be lacking, and I will try to apply the advice that we were given. Essentially, squeeze the piping bag from the top, hold the bag vertically and keep the nozzle at the correct distance away from the icing swirl.

If you are a beginner cupcake baker, or looking to improve your cupcake skills, then this could be the class for you! As for me, I am looking forward to eating more chai flavoured cupcakes as well as experimenting a bit more with flavours. Yum!

Sunday, June 26, 2011

The Sherbet Cafe and Bake Shop


Last Saturday E and I headed into uncharted territory to try out the Sherbet Cafe and Bake Shop in Maylands. We had originally planned to have afternoon tea however we turned up with an appetite for lunch and we ordered accordingly.

The cafe had a steady stream of customers, both for dining in and take away service. We admired the cakes - beautiful cupcakes piled high with icing, towering layer cakes and other treats. There was also a small savoury section and it was from this that I chose a roasted vegetable and gruyere tart. E went with a frittata and we also ordered a slice of the red velvet layer cake to share.

The servings were very generous and E could not eat all of her frittata. I think that she was trying to save room for the cake!


The slice of cake that we were served was enormous. It was accompanied by double cream and I really that the purpose of the cream was to cut the richness of the icing!

We tried our best but in the end we were defeated by the cake. It was lovely and light with extremely rich icing.

I definitely would like to make another visit (or two or three!) and sample more of the cakes on offer. Yum!

Sunday, June 19, 2011

Roasting hazelnuts

The baci semifreddo recipe I made last weekend called for roasted hazelnuts. I armed myself with a packet of hazelnuts and made a beeline for Stephanie Alexander's the cook's companion for advice on how to roast them. It is such a great reference book, with many simple tips and lots of information on all different types of foods.


Roast the hazelnuts at 180C on a baking tray for approximately 10 minutes. Rub them with a clean tea towel to try and remove as much of the skin as you can.

Put them into a sieve and shake to try and separate the nuts and skin. I ended up picking whatever skin was left off by hand.

Baci Semifreddo

After making friands the previous week I was left with a surplus of egg yolks. I considered various recipes to make use of them and kept coming back to custard. In the end I decided that the Baci Semifreddo recipe from Gourment Traveller would fit the bill nicely.

I had six egg yolks and so I adjusted the recipe accordingly.

I really like the hazelnut flavour and the crunch. The Semifreddo also met with my sister E's seal of approval. Yay! I froze this in a loaf tin and have been cutting slices as I go. If I was going to serve this as a fancy dessert I might just invest in some proper moulds...

6 egg yolks
180g caster sugar
3/4 teaspoon vanilla extract
20 ml Frangelico
140 g dark chocolate, melted
1 1/2 tablespoons Dutch-process cocoa, sieved
400 ml thickened cream
180 g crème fraîche
110g roasted hazelnuts, skins removed, coarsely chopped

Line a loaf pan with plastic wrap.

Whisk yolks, sugar, vanilla and Frangelico in a heatproof bowl over a saucepan of simmering water until mixture is tripled in volume, thick and pale and holds a ribbon (4-5 minutes). I used the stab mixer that we received as a wedding present. It has a whick attachment and it was so much easier than the options of my sunbeam mixer (heavy) or by hand (laborious).

Transfer semifreddo mixture to an electric mixer and whisk until cool (2-3 minutes).

Add melted chocolate and cocoa and mix to combine.

Meanwhile, whisk cream and crème fraîche in a bowl until soft peaks form. Again, the stab mixer came in handy for whisking the dairy products.

Fold one-third of dairy into egg mixture to loosen mixture, then fold through remaining cream and hazelnuts.

Spoon into container, cover, freeze until firm (6 hours or overnight).


Notes

  • The original recipe called for a vanilla bean or vanilla paste. I had only vanilla extract or essence in the pantry and so went with vanilla extract

  • I bought a 125g packet of hazelnuts and ended up roasting and using the whole packet

  • I forgot to adjust the Frangelico amount from the recipe! Yum