A few weekends ago I felt the urge to test the lime and coconut recipe that I received from the
Cupcake Class. I had already
tried the Vanilla and Chai recipes and decided to experiment with another flavour.
I had thought that the lime and coconut cupcakes that we tried at the class were lovely and lime flavoured but lacking in a coconut hit, so I played with the flavourings to see if I could bring it out more.
I was very happy with the icing. It was so lovely and smooth and had a great texture! I used coconut cream rather than coconut milk as that was all that was in my pantry, and in future will stick with that.
125g butter
220g caster sugar (1 cup)
2 eggs
113g self raising flour (3/4 cup)
94g plain flour (5/8 cup)
63mL coconut cream (1/4 cup)
63mL sour cream (1/4 cup)
1 teaspoon coconut essence
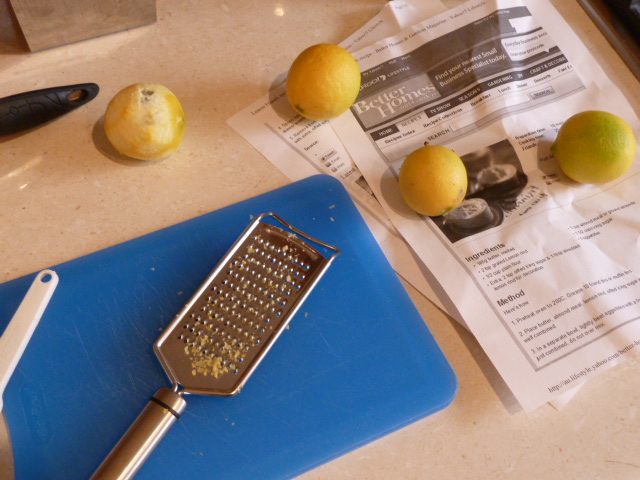
zest of four limes
juice of half a lime
2 tablespoons desiccated coconut
Method
here.
The mixture made twelve cupcakes. I used the
Fox Run Cup Cake Baking Paper sized cupcake liners in my
Analon Commercial Muffin Pan.
The original recipe called for 20 minutes in the oven at 170C. When I checked the cupcakes after 20 minutes I found that they were already overcooked! Next time I will start looking at 18 minutes and take it from there. The cakes were not too dehydrated but were lacking a bit of moistness and were slightly crumbly.
I was also only able to get the zest off three limes and this meant that the cakes did not have the zingy lime flavour that I was expecting. In future I will try to make sure that I use the zest of at least four limes.
I was very happy with the icing that I made. It was so light and fluffy and creamy and when piped it looked so much like soft serve ice cream!
125g butter
1 1/2 cups pure icing sugar, sifted
1 teaspoon coconut essence
1/8 cup coconut cream
Beat butter to an inch of its life, until pale and fluffy.
Gradually add the icing sugar, beating well after each addition. Beat some more.
Add the essence and keep beating.
Finally, add the coconut cream.
There should be a lot of beating of the icing to get it nice and light and fluffy.
I finished off the cupcakes with some toasted shredded coconut. It was pretty easy to toast. I put some shredded coconut onto a baking tray lined with baking paper and put it in the oven for two minutes at 170C. It could probably do with only one and a half minutes however my oven timer only works in one minute increments, and I was too lazy to time it any other way.